
When we first started cooking gluten-free for our boys, finding a chili recipe that was both hearty and safe felt like a tall order. Chili’s such a comfort food for game day and busy weeknights, but a lot of recipes sneak in gluten through seasoning mixes or hidden thickeners. I remember a chilly Saturday when I whipped up this chili while cheering on our favorite team, and it quickly became a family favorite—not just for the flavor but because I knew it was completely safe for our celiac son. That peace of mind means everything at our table. Here’s the thing: gluten can hide in unexpected places, especially in canned products or spice blends, so we always double-check with our trusty /is-it-gluten-free/ checker before buying ingredients. That’s a small step that makes a huge difference. This chili is packed with protein, fiber, and bold flavors, perfect for game day or meal prepping for the week ahead. It’s filling, nourishing, and free from gluten and cross-contamination risks, which is exactly what every gluten-free family deserves. Plus, it’s easy enough to make when you’re juggling a house full of busy kids and activities. Trust me on this one—you’re going to love how simple and satisfying this recipe is for your gluten-free kitchen.
❤️ Why You’ll Love This Recipe
- Packed with protein and fiber for lasting energy
- Uses staple pantry ingredients you likely already have
- Perfect for meal prep and freezes beautifully
- Safe for celiacs with no hidden gluten surprises
- Rich, comforting flavor with minimal fuss
Ingredients & What You Need to Know
The heart of this chili is lean ground beef and protein-packed beans, which keep it hearty and satisfying. We use canned diced tomatoes and tomato paste for a rich, deep base—just make sure to check those labels for gluten with our /is-it-gluten-free/ checker to avoid any cross-contamination. For thickening and a touch of body, this recipe actually skips adding gluten-free flour, but if you want a thicker chili, a small amount of cornstarch or Bob’s Red Mill gluten-free flour blend works well as a slurry. When it comes to seasoning, I rely on pure spices—no pre-mixed packets—because those can sneak in gluten. Brands like King Arthur Gluten-Free and Cup4Cup are fantastic when you need gluten-free baking flours for other recipes, but for chili, fresh herbs and pure spices are your best bet. Using trusted brands helps keep your family safe and your recipes consistently delicious.
🔄 Substitutions & Swaps
- Dairy-free: Skip cheese and sour cream or use vegan alternatives
- Vegetarian: Replace beef with a plant-based ground meat or extra beans
- Thicker chili: Use a cornstarch slurry instead of gluten-free flour
- Spicier: Add diced jalapeños or a pinch of cayenne pepper
- Low sodium: Use low-sodium broth and rinse canned beans thoroughly
Here’s the thing: gluten-free chili is surprisingly forgiving, but a few tips help it shine. One common mistake is rushing the simmer time. Letting it bubble low and slow really brings out the flavors and tenderizes the beans perfectly. Also, don’t skip browning the beef well—that caramelization adds layers of richness you don’t want to miss. When it comes to thickening, I usually skip flour altogether because the beans and tomato paste give a nice body, but if you prefer a thicker chili, a little gluten-free flour or cornstarch slurry works wonders without changing the flavor. Serving suggestions? Our boys love theirs with shredded cheddar and a dollop of sour cream, plus some gluten-free corn chips on the side. For adults, a squeeze of lime and fresh cilantro brightens things up. This chili also pairs beautifully with a simple green salad or steamed veggies for a balanced meal. And remember, cross-contamination is a real concern for celiacs, so always use clean utensils and pots—not just gluten-free ingredients—to keep your meal safe and satisfying.
How to Make Gluten-Free Chili
💡 Pro Tips Before You Start
- Brown the beef well to develop rich flavor and avoid a watery chili
- Always rinse canned beans to reduce sodium and remove canning liquid
- Simmer covered for a more tender, melded flavor but stir occasionally
- Use fresh spices whenever possible—they pack more punch than old ones
- Double-check canned and spice labels for hidden gluten to keep it safe
🗄️ Storage & Make-Ahead
- Room Temperature: Chili shouldn’t be left out at room temperature for more than 2 hours to avoid food safety risks.
- Refrigerator: Store leftover chili in an airtight container in the fridge for up to 4 days.
- Freezer: Freeze chili in freezer-safe containers for up to 3 months. Thaw overnight in the fridge before reheating.
- Reheating: Reheat gently on the stove over low-medium heat, stirring occasionally until warm throughout.
-
2 lbs lean ground beef -
1 large onion, diced -
3 cloves garlic, minced -
1 (28 oz) can diced tomatoes (check gluten-free label) -
1 (15 oz) can kidney beans, drained and rinsed -
1 (15 oz) can black beans, drained and rinsed -
2 tbsp tomato paste -
2 cups beef broth (gluten-free certified) -
2 tbsp chili powder (pure, no additives) -
1 tsp ground cumin -
1 tsp smoked paprika -
1/2 tsp salt -
1/4 tsp black pepper -
2 tbsp olive oil
-
1Preheat and Prep
Heat olive oil in a large pot over medium heat. While it warms, dice your onion and mince the garlic. -
2Cook the Aromatics
Add diced onion to the pot and sauté until translucent, about 5 minutes. Stir in minced garlic and cook another minute until fragrant. -
3Brown the Beef
Add ground beef to the pot. Break it up with a spoon and cook until fully browned and no longer pink. Drain any excess fat if needed. -
4Add Seasonings
Sprinkle the chili powder, cumin, smoked paprika, salt, and pepper over the beef mixture. Stir well to coat everything evenly. -
5Add Tomatoes and Beans
Pour in the diced tomatoes, tomato paste, kidney beans, black beans, and beef broth. Stir everything together thoroughly. -
6Simmer the Chili
Bring the chili to a gentle boil, then reduce heat to low. Cover and let simmer for 30 minutes, stirring occasionally to prevent sticking. -
7Final Taste and Adjust
After simmering, taste your chili and adjust salt or spices if needed. If you want it thicker, mix 1 tablespoon of gluten-free flour or cornstarch with cold water and stir in, cooking a few minutes more. -
8Serve and Enjoy
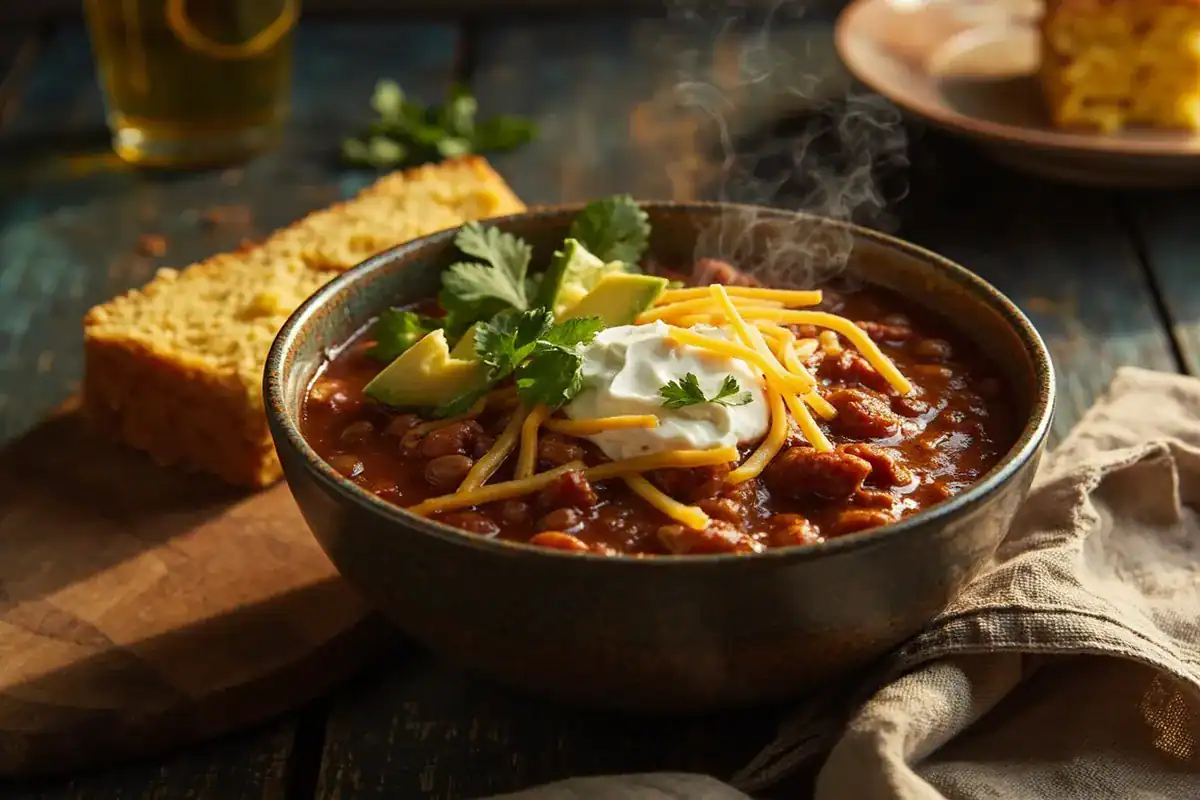
Ladle chili into bowls and serve with your favorite toppings like shredded cheese, sour cream, or green onions. Perfect for game day or meal prep!
Calories
Protein
Carbs
Fat
Fiber
Sugar
Sodium
Nutrition is estimated using a food database. Values may vary based on the specific brands and ingredients you use.
Frequently Asked Questions
Is gluten-free chili gluten-free?
Yes! This recipe is naturally gluten-free as long as you use gluten-free certified ingredients like broth and canned goods. Always double-check labels to avoid hidden gluten.
Can I make gluten-free chili dairy-free?
Absolutely. Simply skip any dairy toppings like cheese or sour cream or swap in your favorite dairy-free versions. The chili itself contains no dairy.
Why did my chili turn out watery?
If your chili is watery, it might not have simmered long enough. Let it cook uncovered for a bit to reduce liquid, or use a gluten-free flour or cornstarch slurry to thicken.
Can I freeze gluten-free chili?
Yes! Chili freezes very well. Store it in airtight containers or freezer bags for up to 3 months. Thaw overnight in the fridge before reheating.
What gluten-free flour works best for chili thickening?
Bob’s Red Mill 1-to-1 Gluten-Free Baking Flour is a reliable choice. King Arthur Gluten-Free and Cup4Cup also work well for thickening and other cooking needs.
Our family has shared countless cozy nights over this chili, cheering on our team and enjoying each other’s company without worrying about gluten sneaking in. I hope it brings that same peace and warmth to your table. If you love this recipe, there’s a whole collection of gluten-free favorites waiting for you at LetsGoGlutenFree.com. And don’t forget to use our /is-it-gluten-free/ checker to keep your kitchen safe and stress-free. Happy cooking from our family to yours!
We’d love to hear how it turned out! Leave a comment and a star rating below — your feedback helps other readers and means the world to us.
Rate This Recipe
Did you make this? We'd love to hear how it turned out!