
When we first started living gluten-free with our boys, finding quick, tasty snacks that everyone could enjoy was a real challenge. Hummus quickly became a household favorite — simple to whip up, packed with protein, and naturally gluten-free when made from scratch. I remember one afternoon when our youngest, who was new to gluten-free eating, asked for a snack. Instead of grabbing store-bought hummus (which sometimes has hidden gluten or cross-contamination risks), I made this smooth gluten-free hummus right in our kitchen in under five minutes. It was a game changer. That matters when you’re juggling kids, school, and all the other chaos.
Here’s the thing: not all store-bought hummus brands are safe for celiacs or those with gluten sensitivities, which is why I love making this recipe at home. You control every ingredient, ensuring no sneaky gluten sneaks in. Plus, you can tweak it to your family’s taste preferences. If you’re ever unsure about whether a packaged hummus or ingredient is gluten-free, the /is-it-gluten-free/ checker on our site is a handy tool to have in your back pocket.
This recipe is as straightforward as it gets, but it’s full of flavor and nutrition. Whether you’re a seasoned GF cook or just starting out, this hummus is a must-try for easy snacks, lunchboxes, or party platters. Our boys gobble it up with veggies, crackers, or spread on sandwiches. Trust me on this one—homemade gluten-free hummus is worth every second.
❤️ Why You’ll Love This Recipe
- Ready in just 5 minutes—no cooking required
- 100% gluten-free and safe for celiac families
- Smooth, creamy texture that everyone loves
- Customizable flavors to suit your family’s taste
- Packed with protein and fiber for a healthy snack
Ingredients & What You Need to Know
The star of this hummus is canned chickpeas—make sure you rinse them well to reduce sodium and improve texture. We stick with organic or trusted brands to avoid cross-contamination risks that celiacs need to watch out for. Tahini is key for that classic creamy richness; I recommend brands like Soom or Joyva which are labeled gluten-free. Fresh lemon juice brightens the dip, so squeezing fresh is best. Garlic adds a punch but can be adjusted for sensitive palates. Olive oil brings everything together with healthy fats and smoothness. Unlike gluten-free baking where flour blends like Bob’s Red Mill 1-to-1 or King Arthur Gluten-Free are crucial, this recipe doesn’t require flour. However, if you want to serve your hummus with gluten-free crackers, Cup4Cup and Bob’s Red Mill GF flour blends make excellent homemade options. Making your own hummus means you skip any questionable additives and keep it safe for your family.
🔄 Substitutions & Swaps
- Use avocado instead of tahini for a creamy, nut-free version
- Dairy-free: This recipe is naturally dairy-free, but double-check tahini brand labels
- For extra spice, add a pinch of cayenne or smoked paprika
- Swap chickpeas for white beans for a milder flavor
- Use water or aquafaba (chickpea liquid) to thin instead of cold water for a richer texture
The magic of this gluten-free hummus is its simplicity. Unlike gluten-free baking where you’re juggling flour blends and binders, this dip relies on whole, natural ingredients that come together quickly. The key is balancing the tahini’s richness with fresh lemon juice and garlic for that classic hummus flavor we all crave. One common mistake is adding too much water at once, which can make the hummus too thin and lose that creamy texture we’re aiming for. Adding water slowly while blending is the trick we swear by.
When it comes to serving, our family loves pairing this hummus with fresh veggie sticks, gluten-free crackers from brands like Mary’s Gone Crackers, or even dolloped on top of salads. It’s also a fantastic spread on gluten-free bread from King Arthur or homemade wraps made with Bob’s Red Mill flour blend. The flavor is versatile enough to customize too—try roasting your garlic beforehand for a milder, sweeter taste, or adding roasted red peppers for a twist.
If you’ve never made hummus from scratch, this recipe is your gateway. It’s forgiving, fast, and—best of all—gluten-free without any guesswork. Plus, making it at home means you skip preservatives and questionable ingredients often found in store-bought versions. Our boys love helping me toss ingredients into the food processor, making snack time a little family fun. Give it a try; your gluten-free family will thank you.
How to Make Gluten-Free Hummus
💡 Pro Tips Before You Start
- Rinse chickpeas well to avoid a metallic or canned taste
- Add water slowly to get the perfect creamy consistency without it being too runny
- Use fresh lemon juice for the best flavor brightness
- Store hummus in an airtight container to prevent it from drying out
- If you want it extra smooth, peel the chickpeas before blending—takes time but worth it for special occasions
🗄️ Storage & Make-Ahead
- Room Temperature: Keep hummus covered at room temperature for no more than 2 hours. After that, refrigeration is best.
- Refrigerator: Store in an airtight container in the fridge for up to 5 days. Give it a good stir before serving.
- Freezer: Freeze hummus in a freezer-safe container for up to 3 months. Thaw overnight in the fridge and stir well before serving.
- Reheating: Hummus is best served cold or at room temperature. If you want it warmer, let it sit out for 30 minutes or gently warm it in the microwave for 15 seconds.
-
1 can (15 oz) chickpeas, drained and rinsed -
1/4 cup tahini (sesame paste) -
1/4 cup fresh lemon juice -
2 tablespoons extra virgin olive oil -
1 garlic clove minced -
1/2 teaspoon ground cumin -
1/2 teaspoon salt -
2-3 tablespoons cold water -
Paprika or parsley for garnish (optional)
-
1Prepare Ingredients
Drain and rinse the chickpeas thoroughly to remove excess sodium and any canned flavor. Mince the garlic finely or use a garlic press for smooth blending. -
2Blend Chickpeas and Tahini
In a food processor, combine the chickpeas, tahini, and lemon juice. Process until smooth, scraping down the sides as needed. -
3Add Olive Oil and Garlic
Add the olive oil, minced garlic, cumin, and salt to the mixture. Blend again until the mixture is creamy and well combined. -
4Adjust Consistency
With the processor running, slowly add cold water one tablespoon at a time until the hummus reaches your desired smoothness. Usually, 2-3 tablespoons do the trick. -
5Taste and Adjust
Give your hummus a taste. Add more salt, lemon juice, or garlic if you want it brighter or bolder. -
6Serve
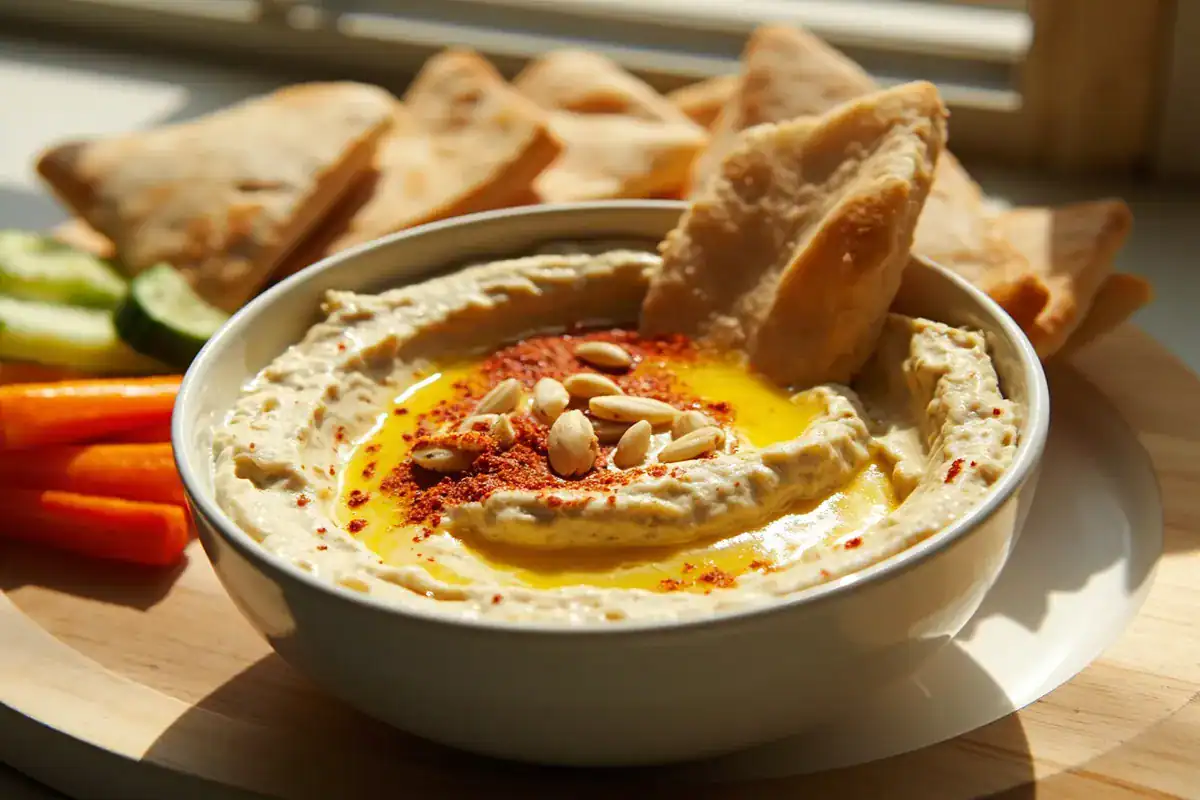
Transfer hummus to a bowl, drizzle with a little olive oil, and sprinkle with paprika or fresh parsley if you like. Serve with gluten-free crackers, veggies, or pita.
Calories
Protein
Carbs
Fat
Fiber
Sugar
Sodium
Nutrition is estimated using a food database. Values may vary based on the specific brands and ingredients you use.
Frequently Asked Questions
Is Gluten-Free Hummus gluten-free?
Yes! This hummus recipe is naturally gluten-free because it uses chickpeas and simple ingredients without any wheat or gluten-containing additives. Just be sure to check that your tahini and spices are labeled gluten-free to avoid cross-contamination.
Can I make Gluten-Free Hummus dairy-free?
Absolutely. This recipe is naturally dairy-free since it doesn’t contain any cheese or yogurt. Just double-check the tahini brand you use, as some might have cross-contact. Otherwise, you’re good to go!
Why did my hummus turn out grainy or dry?
That usually means it needs more moisture or blending. Try adding cold water one tablespoon at a time while blending until you get that smooth, creamy texture. Also, rinsing canned chickpeas well helps prevent a gritty texture.
Can I freeze Gluten-Free Hummus?
Yes, you can freeze it for up to 3 months. Use an airtight container, thaw overnight in the fridge, then stir well before serving. The texture might be slightly different but still delicious.
What gluten-free flour works best for serving with hummus?
While this recipe doesn’t use flour, if you want gluten-free crackers or bread for dipping, we recommend Bob’s Red Mill 1-to-1 or King Arthur Gluten-Free blends for homemade options. Cup4Cup is great if you want a lighter texture.
I hope this gluten-free hummus recipe becomes a staple in your home like it did in ours. It’s quick, reliable, and perfect for busy days when you want something wholesome without the fuss. Our boys asking for it at snack time always makes me smile—it’s a small win in our gluten-free journey. Be sure to check out more of our family-friendly gluten-free recipes on LetsGoGlutenFree.com and don’t forget the /is-it-gluten-free/ checker tool to keep your kitchen safe and stress-free. Happy dipping!
We’d love to hear how it turned out! Leave a comment and a star rating below — your feedback helps other readers and means the world to us.
Rate This Recipe
Did you make this? We'd love to hear how it turned out!