
Creating a gluten-free kitchen can feel like starting from scratch — literally. The first time I began clearing out gluten from our home, I had no idea how sneaky it was. A few crumbs here, a shared spoon there, and suddenly the “safe” meal I worked hard to prepare wasn’t safe at all.
Whether you’re newly diagnosed with celiac disease, navigating gluten intolerance, or simply choosing a cleaner way to eat, transforming your kitchen into a gluten-free zone doesn’t have to be overwhelming. With the right plan, a few smart swaps, and a touch of organization, you can make your kitchen a safe and stress-free place to cook, eat, and enjoy food again.
Let’s walk through the steps together — from deep cleaning to labeling tools — so you can build a kitchen that’s not only gluten-free but family-friendly too.
Step 1: Understand What “Gluten-Free” Really Means
Before diving into decluttering, it helps to understand what gluten actually is and where it hides. Gluten is a protein found in wheat, barley, and rye — and it’s used in far more foods than most people realize. Beyond bread and pasta, gluten can sneak into sauces, soups, salad dressings, seasonings, and even candy.
Here are a few common gluten culprits you might overlook:
- Soy sauce (swap for Tamari or Coconut Aminos)
- Seasoning packets and gravy mixes
- Malt extract or flavoring (often found in cereals and candy)
- Oats that aren’t labeled gluten-free
- Imitation crab, soups, and sauces thickened with wheat flour
When shopping, look for trusted labels like Certified Gluten-Free (GFCO) or Gluten-Free Certified by NSF. These designations mean products have been tested and verified to meet strict gluten-free standards.
If you’re just starting out, check out our Hidden Sources of Gluten in Everyday Foods guide — it’s a great resource to keep handy on your phone during grocery runs.
Step 2: Declutter & Deep Clean Your Kitchen
Before you start bringing in new gluten-free products or labeling containers, it’s time for a fresh start. Think of this as your kitchen reset button. The goal here isn’t just tidying up — it’s removing every trace of gluten that could sneak its way into your meals.
If you’ve been cooking with wheat flour, baking with regular bread crumbs, or using the same utensils for everything, gluten has likely found its way into cracks, drawers, and corners you didn’t even know existed. But don’t panic — one good deep clean can set you up for success.
1. Empty Everything
Start by taking everything out of your pantry, cabinets, drawers, and refrigerator. Yes, everything.
- Toss expired or questionable items.
- Check all sauces, condiments, and spices — you’ll be surprised how many contain gluten.
- Create three zones: Keep (gluten-free), Replace Later, and Discard.
This visual separation helps you see what’s safe and what’s not.
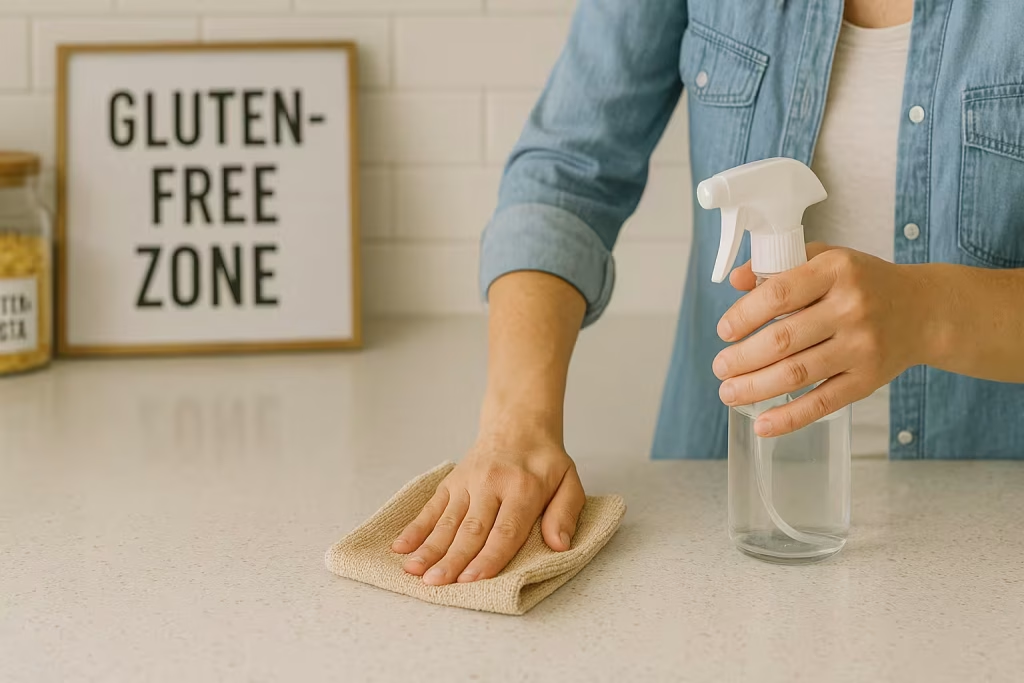
2. Deep Clean from Top to Bottom
Once your kitchen is bare, it’s cleaning time. Use simple, fragrance-free cleaners like vinegar and baking soda to avoid harsh chemicals that could linger on surfaces. Wipe every shelf, countertop, drawer, and cabinet. Pay special attention to places where flour dust may have settled — mixers, backsplashes, and utensil trays are sneaky culprits.
Here’s a quick Gluten-Free Cleaning Checklist to guide you:
| Area | What to Clean | Pro Tip |
|---|---|---|
| Pantry | Remove all open boxes, grains, and flours | Wipe shelves with vinegar or a gluten-free cleaner |
| Countertops | Clear everything and disinfect | Use a fresh cloth or sponge just for gluten-free cleaning |
| Appliances | Mixers, toasters, blenders, and air fryers | Replace or deep-clean—crumbs love hiding here |
| Utensils & Tools | Check for scratches, especially wooden or plastic items | Replace anything porous or difficult to clean |
| Dish Towels & Sponges | Start fresh | Old ones often hold gluten particles |
3. Focus on Hidden Hot Spots
There are a few overlooked areas that deserve extra care:
- Toaster trays: Crumbs collect fast — even one crumb can contaminate your gluten-free toast.
- Silverware drawers: Remove everything, vacuum, and wipe it out before restocking.
- Stand mixers & blenders: Flour can cling to crevices. Disassemble and clean thoroughly.
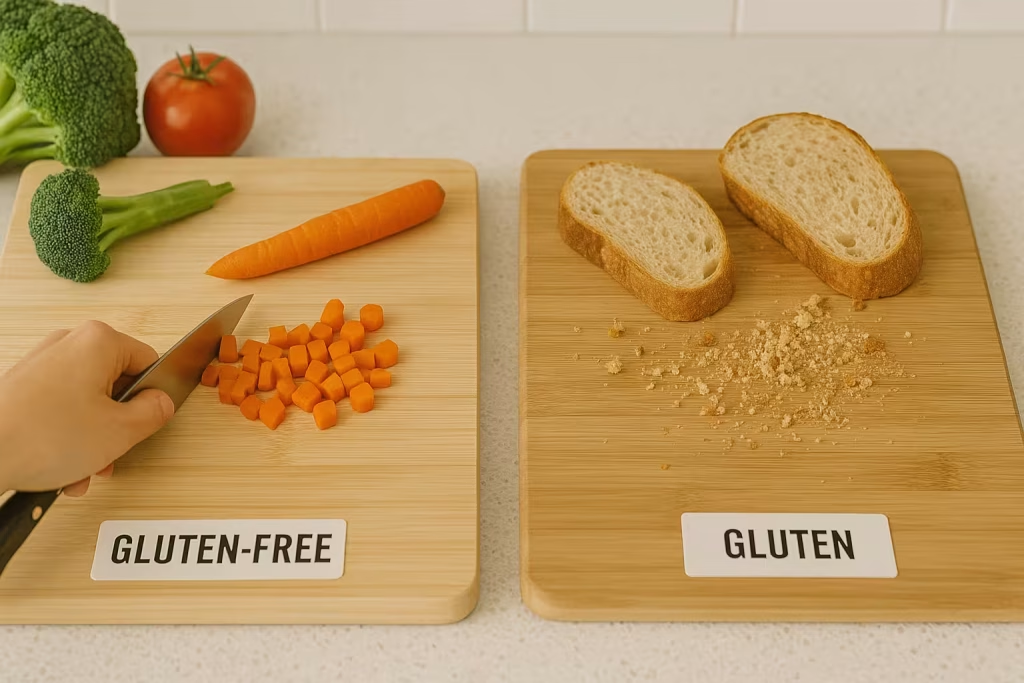
- Cutting boards: If you’ve used them for regular bread or pasta, it’s best to replace them.
4. Reset with Intention
Once everything is sparkling clean, bring only the gluten-free safe items back in. This is your clean slate moment — your chance to rebuild a kitchen that supports your new lifestyle instead of working against it.
If you want to take it a step further, place a small “Gluten-Free Zone” label inside a cabinet door or on your pantry shelf as a daily reminder. It’s a simple visual cue that helps everyone in the family stay mindful.
Step 3: Create Dedicated Gluten-Free Zones
If your entire household isn’t gluten-free, this is where your setup really matters.
The goal is to create safe zones in your kitchen where cross-contamination can’t happen. Think of it like traffic lanes — gluten-free and gluten should never cross paths.
A few easy ideas:
- Separate prep areas: Dedicate one countertop for gluten-free cooking only.
- Color-code tools: Use blue or green utensils for GF cooking so they’re easy to identify.
- Label storage containers: Clearly mark which are gluten-free.
- Use shelf dividers or bins: Keep gluten-free foods on higher shelves so crumbs don’t fall down.
Visual organization not only prevents mix-ups but also helps your family remember what’s off-limits. A few clear labels can go a long way in keeping everyone on the same page.
Step 4: Replace or Label Key Kitchen Tools
Some kitchen tools just can’t be cleaned well enough once they’ve come into contact with gluten. Anything porous or scratched can trap gluten particles, even after washing.
Here are the tools you should replace right away:
- Wooden spoons and cutting boards
- Plastic or silicone spatulas with scratches
- Toasters or toaster ovens used for regular bread
- Colanders or strainers
- Non-stick pans with worn surfaces
Once you’ve replaced these, label the rest. You can use color-coded stickers, tape, or even write directly on handles. I love using small adhesive dots — one color for gluten-free, one for regular — because they’re quick to spot at a glance.
Pro Tip: If you’re not ready to fully duplicate your kitchen tools, focus on high-contact items first — like spatulas, pans, and bakeware — and store them separately.
Step 5: Organize Gluten-Free Storage Smartly
Organization isn’t just about making your kitchen look nice; it’s about safety and ease. A well-organized gluten-free space saves time and reduces the chance of contamination.
Smart storage ideas:
- Use clear airtight containers for flours, cereals, and snacks.
- Label everything with both the item name and “GF.”
- Store gluten-free foods above gluten-containing items (crumbs fall down, not up).
- Designate a gluten-free snack bin that kids can grab from safely.
- Keep your gluten-free baking supplies in a separate cabinet or drawer.
If you’re more visual, think of creating a “gluten-free zone” shelf in your pantry — one that’s clean, clearly labeled, and easy for everyone in the house to recognize.
Step 6: Stock the Right Ingredients & Essentials
A gluten-free kitchen starts with having the right staples on hand. This makes meal prep faster and helps you avoid temptation when hunger strikes.
Here’s a handy reference list for restocking your pantry:
| Category | Gluten-Free Alternatives |
|---|---|
| Flour | Almond flour, coconut flour, oat flour (certified GF), or all-purpose GF blends |
| Bread | Canyon Bakehouse, Udi’s, Simple Kneads |
| Pasta | Brown rice, lentil, or chickpea pasta |
| Soy Sauce | Tamari or Coconut Aminos |
| Condiments | Heinz ketchup, Primal Kitchen mayo, Sir Kensington’s mustard |
| Snacks | Siete chips, Kind bars, Simple Mills crackers |
| Baking | Pamela’s, King Arthur GF mixes |
Make a small investment in airtight jars or pantry bins — not only will your kitchen look cleaner, but you’ll also protect your gluten-free ingredients from cross-contact and pests.
Step 7: Learn Cross-Contamination Prevention
Cross-contamination is the hidden enemy of gluten-free living. Even a breadcrumb can cause symptoms for someone with celiac disease.
Here are everyday habits to prevent it:
- Always wash your hands before handling gluten-free food.
- Use separate butter, peanut butter, and jam jars — or squeeze bottles to avoid shared knives.
- Avoid double-dipping in sauces.
- Store GF utensils, pots, and pans in a separate section.
- Use different cloths or sponges for cleaning GF surfaces.
Red Flags to Watch Out For
- Shared toasters or cutting boards.
- Gluten flour used in the same area for baking.
- Airborne flour (it can linger for hours after baking).
- Wooden utensils or bowls used interchangeably.
- Family members unaware of the “rules.”
The key here is consistency. Once everyone learns the system, gluten-free living becomes second nature.
Step 8: Communicate With Family & Guests
Even the most organized kitchen can go off track if everyone in the house isn’t on board. Education and communication are your best tools for keeping your gluten-free kitchen safe.
Here are a few ideas that work well in real life:
- Create a “Gluten-Free Only” section of your fridge or pantry with a sign.
- Explain why gluten-free matters, not just what foods are off-limits.
- Use humor and visuals — like “STOP! Gluten-Free Zone Ahead” labels.
- If guests come over, gently guide them toward safe utensils or snacks.
You can even print a short Gluten-Free Kitchen Rules Card to hang on your fridge:
- Always wash hands before touching gluten-free food.
- No shared butter, condiments, or cutting boards.
- Keep gluten-free foods sealed and labeled.
The more people understand, the fewer accidents you’ll have.
Step 9: Create a Gluten-Free Kitchen Checklist
Before you wrap up your kitchen transformation, use this quick checklist to make sure nothing’s missed.
You can even print it or laminate it for your pantry door!
Tools to Replace
- Wooden utensils
- Toaster
- Cutting boards
- Strainers
- Baking sheets with residue
Cleaning & Organization
- Deep-clean all surfaces
- Replace sponges and towels
- Create labeled bins
- Separate GF prep zone
Pantry Staples
- Certified gluten-free flours
- GF condiments and sauces
- Snack options for on-the-go
Labeling System
- Color-code gluten-free tools
- Use bold, simple pantry labels
- Store GF items above gluten products
Want a printable version? Download our free Gluten-Free Kitchen Checklist here.
Step 10: Common Mistakes to Avoid
Even with the best intentions, it’s easy to overlook small details that can lead to gluten sneaking back into your kitchen. These missteps are incredibly common, especially when multiple family members are sharing the space or when you’re still getting used to new routines. The good news? Every one of them is fixable.
Below are some of the most frequent pitfalls I see (and made myself in the beginning!) — along with a few quick tips to stay on track:
Top Gluten-Free Kitchen Mistakes
- Keeping a Shared Toaster
Those tiny crumbs are gluten bombs waiting to happen. A single crumb can contaminate your gluten-free bread. If you can’t buy a second toaster, use toaster bags that keep your gluten-free bread protected. - Holding on to Old Wooden Utensils or Cutting Boards
Wood is porous, meaning it traps gluten deep inside — especially if it’s been used for kneading or breading. Replace these items with new ones made from silicone, stainless steel, or bamboo. - Ignoring Condiments and Spreads
Peanut butter, jam, and butter jars are classic “double-dip” zones. One knife that’s touched regular bread is all it takes. Switch to squeeze bottles or label separate gluten-free jars for your household. - Not Cleaning Appliances Thoroughly
Crumbs and flour dust love to hide in mixers, air fryers, waffle irons, and even knife blocks. Take time once a month to deep-clean these tools or reserve specific appliances for gluten-free use only. - Assuming All Products Labeled ‘Wheat-Free’ Are Safe
“Wheat-free” doesn’t always mean gluten-free. Products can still contain barley or rye derivatives. Always look for the Certified Gluten-Free label or check ingredient lists carefully. - Forgetting About Flour Dust
Airborne flour can linger for up to 24 hours after baking. If someone in your home still bakes with regular flour, wait at least a full day before preparing gluten-free foods in that space. - Not Replacing Sponges or Dishcloths Regularly
These small items are often the biggest contamination culprits. Keep a color-coded set for gluten-free cleaning only, and replace them often.
Quick Fix Tips
- Color-code everything — utensils, bins, towels — so it’s instantly clear what’s gluten-free.
- Create a “reset routine” once a week: wipe counters, check jars, and review labels.
- Keep your gluten-free cooking tools in one easily identifiable spot.
- Educate anyone who cooks or eats in your kitchen — even guests — about the basics.
Avoiding these mistakes isn’t about perfection — it’s about awareness. The more you practice gluten-free habits, the easier they become. Soon, keeping your kitchen safe and organized will feel completely natural.
Step 11: Frequently Asked Questions
If you’re just beginning your gluten-free journey, it’s completely normal to have questions — lots of them. Whether you’re wondering what really needs replacing in your kitchen, how to keep family meals safe, or if cleaning products can secretly contain gluten, you’re not alone. These are some of the most common questions I hear from readers and families who are setting up their gluten-free kitchens for the first time. Let’s clear up a few of the biggest ones together.
Do I have to replace everything in my kitchen?
Not necessarily. Only items that can’t be cleaned thoroughly or have come into contact with gluten — like wooden spoons, scratched pans, or toasters — should be replaced.
Can gluten-free and regular cooking coexist in the same kitchen?
Yes, but it takes effort. Create separate zones, utensils, and storage to minimize cross-contact. Keep communication clear and habits consistent.
How can I teach my kids gluten-free safety?
Make it visual and positive! Use color-coded bins or stickers, and explain that it’s about feeling good, not missing out.
Do cleaning products need to be gluten-free too?
No, since gluten can’t be absorbed through the skin. However, stick to simple, non-toxic cleaners like vinegar or baking soda for a safer home overall.
How do I know if my kitchen is truly gluten-free?
If every utensil, surface, and ingredient is either brand new or thoroughly cleaned, and your system is clearly labeled — you’re there! Consistency keeps it that way.
Step 12: Other Helpful Resources
Building and maintaining a gluten-free kitchen is much easier when you have trustworthy resources to lean on. Thankfully, there are several professional organizations and foundations that provide science-backed information, product certifications, and ongoing support for gluten-free living. Whether you’re looking to understand ingredient labels, stay updated on gluten-free recalls, or find safe brands, these organizations are excellent starting points:
1. Celiac Disease Foundation (CDF)
The Celiac Disease Foundation is one of the most respected organizations for education, research, and advocacy. Their website offers an easy-to-navigate gluten-free product finder, symptom checkers, and printable guides for managing celiac disease at home.
2. Gluten Intolerance Group (GIG)
GIG is dedicated to empowering and educating the gluten-free community. They’re best known for their GFCO certification label, which identifies products tested to meet strict gluten-free standards. Their resources also cover safe dining practices and gluten-free food safety for shared kitchens.
3. Beyond Celiac
A leading nonprofit focused on advancing research, Beyond Celiac provides reliable medical and lifestyle information for individuals with celiac disease. Their community stories, gluten-free living tips, and scientific updates make them a go-to for long-term support and connection.
4. National Celiac Association (NCA)
The NCA focuses on practical help for families, offering nationwide support groups, recipe collections, and product safety alerts. Their mission goes beyond awareness — they actively assist people in transitioning their kitchens and daily routines to be 100% gluten-free
Each of these organizations brings something unique to the table — from certification expertise to family-friendly resources — and all share a commitment to improving life for those living gluten-free. Bookmark them, subscribe to their newsletters, and lean on their tools as you continue building confidence in your gluten-free kitchen.
Step 13: Making Gluten-Free Living a Habit, Not a Hassle
Transitioning to a gluten-free kitchen isn’t just about swapping ingredients — it’s about building new habits that become part of everyday life. The first few weeks might feel like a learning curve, but soon you’ll find your rhythm. You’ll know exactly where everything goes, which tools to use, and which products you can trust.
And most importantly — you’ll cook with confidence again.
The peace of mind that comes from knowing your food is truly safe is worth every minute of effort. Start with small steps, stay consistent, and celebrate progress, not perfection.
If you haven’t already, download the Gluten-Free Kitchen Checklist and keep it nearby. It’s the perfect companion as you take this next step in your gluten-free journey.
You’ve got this — one clean counter, one labeled jar, and one gluten-free meal at a time.