
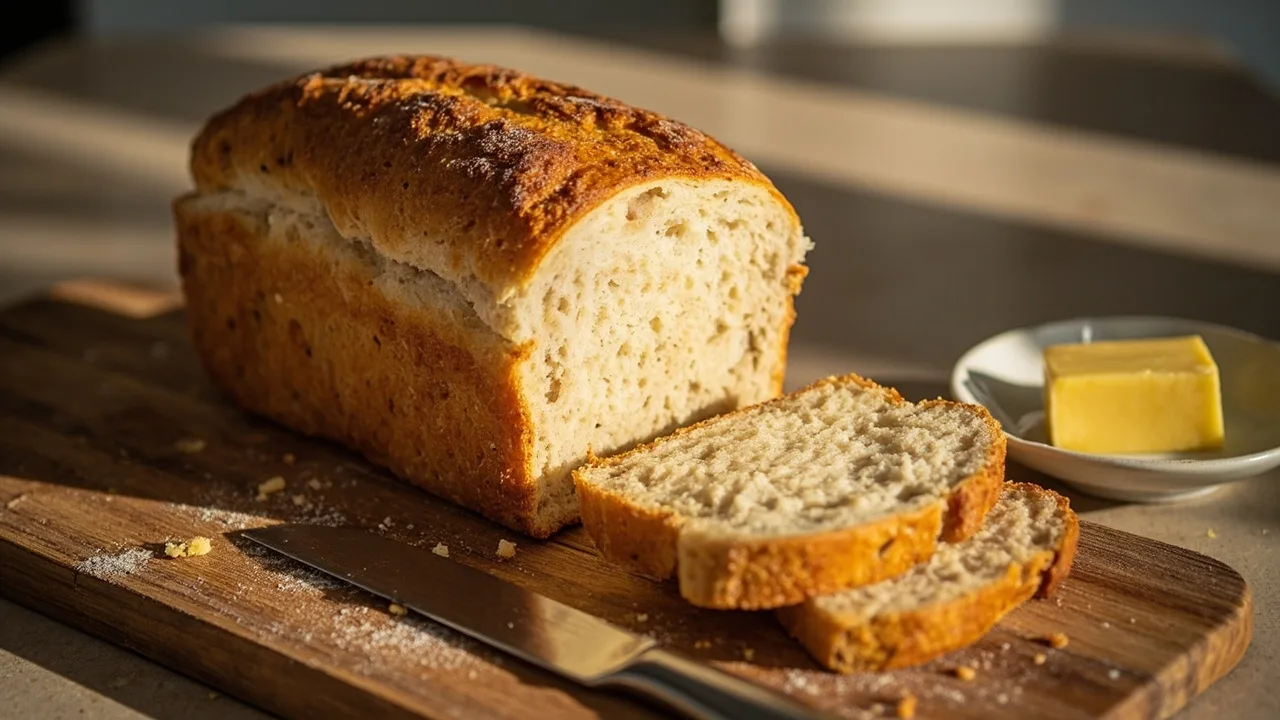
If you’ve ever tried gluten-free sandwich bread, you know the struggle is real. It’s either crumbly, dense, or downright impossible to slice without turning it into a pile of crumbs. When our boys were first diagnosed with celiac disease, I quickly learned that good gluten-free bread wasn’t just a nice-to-have—it was essential for our family dinners, school lunches, and those quick snacks on the go. Finding a loaf that’s soft, slices cleanly, and tastes great felt like an impossible dream. That’s exactly why I developed this Soft Gluten-Free Sandwich Bread recipe. It’s a game-changer.
What makes this recipe really matter for celiac families is that it’s designed to be reliable and safe, with clear guidance on avoiding cross-contamination. Plus, if you’re unsure about any ingredient you want to swap in, you can always check it with the /is-it-gluten-free/ checker on our site—trust me, it’s a lifesaver. This bread rises beautifully without weird textures, holds together well, and keeps soft for days, which means less waste and more smiles at the table.
I love sharing this with other gluten-free families because I know firsthand how frustrating gluten-free baking can be. This isn’t just bread—it’s a little slice of normalcy. It’s the sandwich bread that our boys actually ask for again and again. And if you’re ready to say goodbye to crumbly, sad loaves, this recipe is your new best friend.
❤️ Why You’ll Love This Recipe
- Soft, tender crumb that slices cleanly every time
- Uses trusted gluten-free flours like Bob’s Red Mill 1-to-1
- Easy to make with simple pantry ingredients
- Perfect for sandwiches, toast, and quick snacks
- Safe for celiacs with clear cross-contamination tips
Ingredients & What You Need to Know
Gluten-free baking flour blends can make or break your bread, and for this recipe, I recommend Bob’s Red Mill Gluten-Free 1-to-1 Baking Flour. It has the right balance of rice flours and potato starch to create a soft but structured crumb. King Arthur Gluten-Free Multi-Purpose Flour or Cup4Cup are also excellent options if you prefer their texture or flavor profiles. Each blend behaves a bit differently, so stick with one you trust for best results.
Xanthan gum is your bread’s best friend here—it helps mimic the elasticity gluten provides, so your loaf holds together without crumbling. I pair it with quick-acting yeast and a little sugar to give the bread lift and a nice golden crust. And don’t skip the eggs or the butter; they add moisture and richness that keep this bread from drying out quickly. For celiac families, using certified gluten-free ingredients and avoiding cross-contact in your kitchen is key—always double-check your labels and tools.
🔄 Substitutions & Swaps
- Dairy-free: Replace butter with coconut oil or vegan butter
- Egg-free: Use 1/4 cup unsweetened applesauce plus 1 teaspoon baking powder per egg
- Sugar-free: Substitute sugar with a natural sweetener like maple syrup (reduce liquid slightly)
- Flour blend: Swap Bob’s Red Mill for King Arthur Gluten-Free Multi-Purpose Flour or Cup4Cup
- Vegan: Combine egg-free and dairy-free substitutions and add 1 tablespoon ground flaxseed mixed with 3 tablespoons water as a binder
Gluten-free bread baking can feel intimidating, but here’s the thing: it’s all about balancing moisture, structure, and rise. Without gluten, your bread needs a little help to hold together and stay soft. That’s where xanthan gum and the right flour blend come in. They create a network that traps air bubbles and keeps your loaf from falling apart. Our recipe strikes that balance perfectly, giving you a loaf that slices like traditional sandwich bread.
One common mistake is slicing the bread too soon. I’ve been there—trying to rush and end up with a crumbly mess. Wait at least an hour after baking; this lets the crumb set and makes slicing easier. Also, don’t be tempted to add extra flour to the dough—it looks wet, but that’s exactly how it should be.
This bread is so versatile, it pairs wonderfully with everything from peanut butter to turkey and avocado. Our boys love it toasted with honey or as the base for their favorite grilled cheese. It’s also a great vehicle for your favorite sandwich fillings or simply slathered with butter and jam. Trust me on this one—once you master this loaf, you’ll wonder why you ever settled for anything less.
How to Make Gluten-Free Sandwich Bread
💡 Pro Tips Before You Start
- Always proof your yeast first to ensure your bread will rise well.
- Use room temperature eggs to help your dough come together smoothly.
- Don’t skip the cooling step—warm gluten-free bread can crumble when sliced.
- Avoid overmixing; stir just until ingredients are combined to keep bread tender.
- Store bread well wrapped to maintain softness and prevent drying out.
🗄️ Storage & Make-Ahead
- Room Temperature: Store the bread in an airtight container or bread box at room temperature for up to 3 days. Keep it wrapped tightly to prevent it from drying out.
- Refrigerator: You can refrigerate the bread in a sealed plastic bag or airtight container for up to a week. Refrigeration may slightly dry the bread, so toast slices before serving.
- Freezer: Slice the bread before freezing. Wrap slices individually or in small stacks with plastic wrap and place them in a freezer bag. Freeze for up to 3 months. To thaw, leave slices on the counter or toast directly from frozen.
- Reheating: Warm slices in a toaster or oven at 350°F for 5-7 minutes. This refreshes the crust and softens the crumb nicely.
-
2 cups gluten-free all-purpose flour (we use Bob’s Red Mill 1-to-1) -
1 teaspoon xanthan gum -
2 teaspoons instant yeast -
1 tablespoon granulated sugar -
1 teaspoon salt -
1 cup warm water (110°F/43°C) -
2 large eggs, room temperature -
3 tablespoons unsalted butter, melted (or coconut oil for dairy-free) -
1 teaspoon apple cider vinegar
-
1Preheat and Prep
Preheat your oven to 350°F (175°C). Grease a 9×5-inch loaf pan with butter or a non-stick spray safe for gluten-free baking. -
2Activate the Yeast
In a small bowl, combine warm water, sugar, and yeast. Stir gently and let it sit for 5-10 minutes until foamy. If it doesn’t foam, your yeast might be inactive—start again. -
3Mix Dry Ingredients
In a large bowl, whisk together gluten-free flour, xanthan gum, and salt until well combined. -
4Combine Wet Ingredients
In a separate bowl, beat eggs, melted butter, and apple cider vinegar together. -
5Make the Dough
Pour the yeast mixture and wet ingredients into the dry mix. Stir with a sturdy spoon or spatula until a sticky dough forms. The dough will be wetter than traditional bread dough—this is normal. -
6First Rise
Transfer dough to the greased loaf pan and smooth the top with a wet spatula. Cover loosely with plastic wrap or a clean kitchen towel. Let it rise in a warm spot for about 45 minutes, or until it has roughly doubled in size. -
7Bake
Place the loaf pan in the oven and bake for 40-45 minutes. The bread should get golden brown on top and sound hollow when tapped. Insert a toothpick to check doneness—it should come out clean. -
8Cool Completely
Remove the bread from the pan and cool on a wire rack for at least 1 hour before slicing. This step is crucial for clean slices and texture.
Calories
Protein
Carbs
Fat
Fiber
Sugar
Sodium
Nutrition is estimated using a food database. Values may vary based on the specific brands and ingredients you use.
Frequently Asked Questions
Is Soft Gluten-Free Sandwich Bread You Can Actually Slice gluten-free?
Yes! This recipe uses certified gluten-free ingredients and is designed to be safe for celiac families. Just be sure to avoid cross-contact by using clean utensils and surfaces.
Can I make Soft Gluten-Free Sandwich Bread You Can Actually Slice dairy-free?
Absolutely. Simply swap the butter for coconut oil or a vegan butter alternative, and you’ll have a dairy-free version that’s just as soft and delicious.
Why did my gluten-free sandwich bread turn out dense or crumbly?
Density or crumbliness usually means the yeast didn’t activate properly or the bread was sliced too soon. Always proof your yeast until foamy and let the bread cool completely before slicing.
Can I freeze Soft Gluten-Free Sandwich Bread You Can Actually Slice?
Yes, freezing is a great way to keep this bread fresh. Slice it first, wrap it tightly, and freeze for up to 3 months. Toast or thaw slices before serving.
What gluten-free flour works best for Soft Gluten-Free Sandwich Bread You Can Actually Slice?
I recommend Bob’s Red Mill Gluten-Free 1-to-1 Baking Flour for its reliable performance. King Arthur Gluten-Free Multi-Purpose Flour and Cup4Cup also work well if you prefer those blends.
Baking gluten-free bread that our whole family loves has been such a rewarding journey. Our boys’ smiles when they take that first slice remind me why I keep sharing these recipes. If you’re new to gluten-free baking or looking for a reliable sandwich bread, give this recipe a try—it might just become your new staple. And if you want to explore more gluten-free recipes or double-check your ingredients, don’t forget to visit our /is-it-gluten-free/ checker. Here’s to soft, sliceable bread and happy, healthy families!
We’d love to hear how it turned out! Leave a comment and a star rating below — your feedback helps other readers and means the world to us.
Rate This Recipe
Did you make this? We'd love to hear how it turned out!