
Gluten-free cookies that spread into a greasy puddle. Muffins that could double as hockey pucks. Bread with a gummy, raw-tasting center. If you’ve experienced any of these gluten-free baking problems, you are absolutely not alone — and it’s not your fault.
The science behind GF baking is genuinely different from conventional baking. Without gluten to create structure and trap air, your baked goods behave by completely different rules. What works in a wheat-based recipe can actively sabotage a gluten-free one.
I’ve burned through more batches of cookies than I care to admit in my own kitchen. But after years of baking for my boys and learning the why behind each failure, I’ve figured out exactly what’s going wrong — and more importantly, how to fix it. The most common gluten-free baking problems — spreading cookies, dense texture, and gritty mouthfeel — all have specific, fixable root causes.
In this guide, we’re going deep on each failure so you can actually understand what’s happening in your bowl. Let’s troubleshoot your gluten-free baking once and for all.
Key Takeaways
- Spreading cookies are almost always caused by too much fat, warm dough, or the wrong flour ratio — all fixable with simple adjustments.
- Dense, heavy texture usually means your leavening isn’t working hard enough or your flour blend lacks enough starch to lighten the crumb.
- Gritty mouthfeel is typically caused by rice flour that hasn’t been finely milled — switching brands or flour types often solves this immediately.
- Chilling your dough and measuring by weight (not volume) are two of the highest-impact habits you can build for consistent GF baking results.
- Understanding how each flour and binder behaves gives you the power to adapt any recipe — not just follow it blindly.
Why Your Gluten-Free Cookies Spread (And How to Stop It)
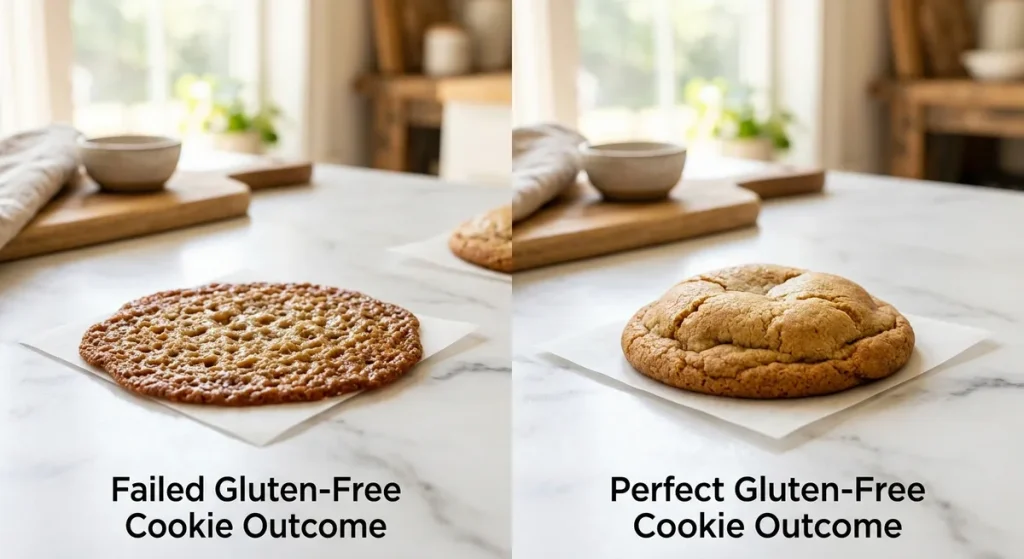
Spreading is the number one complaint I hear from GF bakers. You put beautiful little dough balls on the sheet, open the oven 12 minutes later, and find a thin, lacy, crispy mess instead of a cookie. Here’s what’s actually happening.
The root cause: In conventional baking, gluten creates a protein network that holds the cookie’s shape as it bakes. Without it, GF dough has nothing to trap the structure in place. The moment heat hits the fat, it melts — and if there’s nothing holding the dough up, it just flows outward.
Several specific factors make spreading worse:
- Butter that’s too warm or melted. Softened is fine. Melted or greasy-warm is not. Warm fat starts spreading before the starches and binders in your GF flour have time to set.
- Too much sugar, especially brown sugar. Sugar liquefies in the oven before it caramelizes. More liquid = more spread. Brown sugar holds extra moisture and spreads even more than white.
- Wrong flour blend — too much starch, not enough protein. Blends heavy in tapioca starch or arrowroot are light and lovely for texture, but they don’t hold structure. You need a balanced blend.
- No chilling time. This is the single biggest fix most people don’t try. Chilling solidifies the fat and lets the binders (like xanthan gum) firm up the dough before it hits heat.
- Too little binder. Xanthan gum, psyllium husk, or flax eggs act as the “glue” that replaces gluten’s structural role. Without enough, the dough just can’t hold itself together.
The fixes:
- Use butter at true room temperature (65–68°F), not warm or melted.
- Try reducing sugar by 2–3 tablespoons in your next batch.
- Add an extra egg yolk — it adds fat and richness without more liquid.
- Check that your xanthan gum is fresh (it loses potency over time) and properly measured.
- Always chill your dough. Always.
Why Your GF Baked Goods Turn Out Dense or Heavy
Dense muffins, flat cakes, bread that feels like a brick — this is the second most frustrating gluten-free baking problem. And unlike spreading, dense texture usually comes from something lacking rather than something excessive.
The root cause: Gluten’s protein network doesn’t just hold shape — it traps the air bubbles created by leavening agents. Without that network, CO₂ gas from your baking powder or yeast escapes before the crumb has a chance to set. The result is a crumb that never “opened up.”
Other common contributors to density:
- Old or insufficient leavening. Baking powder loses potency after 6–12 months. Many GF recipes need slightly more leavening than their wheat counterparts to get proper lift. Test your baking powder: drop a teaspoon in hot water. If it doesn’t foam vigorously, replace it.
- Too much binder. Yes, this is the opposite of the spreading problem. Too much xanthan gum makes dough heavy and gummy — it weighs the batter down instead of supporting it. Use the right amount for your flour, not more.
- Heavy flour blend. A blend that’s mostly whole grain flours (like brown rice or teff) without enough starch will produce a heavier crumb. You need starch in the mix to lighten it.
- Overmixing. This one surprises people. GF batters can become gummy if overworked because you’re activating the starches prematurely. Mix until just combined.
- Not enough eggs or egg replacer. Eggs provide structure, leavening, and binding all at once. Reducing eggs to save calories often results in a noticeably denser product.
The fixes:
- Test and replace your baking powder if it’s more than a year old.
- Add an extra ¼ tsp of baking powder per cup of GF flour blend (for cookies and muffins).
- Use room temperature eggs — cold eggs deflate batter.
- Mix just until no dry streaks remain. Then stop.
- Let your batter rest for 10–15 minutes before baking. This lets the starches and binders hydrate fully, which actually improves texture and rise.
Why Your GF Baked Goods Taste Gritty or Sandy
You did everything right. The cookies held their shape. The texture looks great. But when you bite in, there’s that unmistakable gritty, sandy feeling on your tongue. This one is all about your flour.
The root cause: Most gluten-free flour blends rely heavily on rice flour — white rice flour or brown rice flour. When rice flour isn’t finely milled enough, the larger starch granules don’t fully hydrate during baking, and you can actually feel them in the finished product.
This is not a problem with wheat flour because wheat starch granules are naturally finer. Rice starch granules vary dramatically depending on how the flour was milled.
Other grittiness culprits:
- Budget or store-brand rice flour. The grinding process matters enormously. Cheaper brands often use coarser grinds.
- Cornmeal-heavy blends. Some blends use cornmeal or coarser corn flour, which adds texture that reads as gritty in delicate baked goods.
- Insufficient resting time. Starches need time to absorb liquid. Baking immediately after mixing doesn’t give them that chance.
- Almond flour that’s too coarse. Almond flour varies hugely between brands. Super-fine blanched almond flour is smooth; regular almond flour or almond meal is noticeably grainy.
The fixes:
- Switch to a super-fine or finely milled rice flour (Bob’s Red Mill Super-Fine, or Anthony’s Premium White Rice Flour).
- Let your batter or dough rest 15–30 minutes before baking so starches fully hydrate.
- Try replacing some rice flour with tapioca starch or potato starch for a smoother crumb.
- For almond flour recipes, choose blanched super-fine almond flour only (Anthony’s, Bob’s Red Mill Superfine, or Wellbee’s).
- Sift your flour blend before using — this breaks up any clumps and aerates it.
Our Top Flour Blends and Tools for Fixing GF Baking Problems
You can troubleshoot technique all day, but if you’re starting with a low-quality flour blend, you’re working uphill. Here are the products that have made the biggest difference in my own kitchen.
This is my daily driver for cookies, muffins, and quick breads. The xanthan gum is already included, it’s GFCO-certified, and the blend is specifically formulated to mimic all-purpose flour in a 1:1 swap. My boys can’t tell the difference in most recipes.
GFCO-certified and tested extensively by King Arthur’s bakers. It handles cookies, cakes, and muffins beautifully. Slightly lighter texture than Bob’s 1-to-1, which makes it excellent for cakes. Around $8–$10 for 3 lbs.
Blanched, super-fine, and certified gluten-free. This is the almond flour that eliminates gritty mouthfeel in almond-based recipes. Around $13–$15 for 2 lbs. Excellent for cookies and quick breads.
Developed by a Thomas Keller restaurant team, this is one of the finest-milled commercial blends available. It contains milk powder, so not dairy-free, but the texture it produces in baked goods is genuinely impressive. Around $12 for 3 lbs.
Measuring GF flour by weight instead of volume is one of the highest-impact changes you can make. Scooping flour compresses it and throws off your ratios. A kitchen scale runs $30–$50 and pays for itself in saved failed batches.
One to approach with caution: Bob’s Red Mill All Purpose Gluten-Free Flour (the red bag) does NOT contain xanthan gum and is formulated differently than the 1-to-1 (blue bag). Many new GF bakers buy the red bag expecting a simple swap and end up with flat, crumbly results. Read the label carefully.
Common Gluten-Free Baking Mistakes to Watch Out For
GF Baking Troubleshooting Checklist
- Swapping a 1-to-1 blend into yeast bread recipes — most 1-to-1 blends are not formulated for yeast and will not rise properly. Use a bread-specific flour blend.
- Measuring flour by volume (cups) instead of weight (grams) — GF flour densities vary dramatically between blends, making volume measurements unreliable.
- Using cold eggs straight from the refrigerator — cold eggs don’t emulsify as well and can cause batter to seize or under-rise.
- Skipping the batter rest — 10–15 minutes of rest lets xanthan gum and starches fully hydrate and dramatically improves final texture.
- Opening the oven door too early — GF baked goods are more fragile during baking and can collapse if heat escapes before the structure is set. Wait until the minimum bake time has passed.
- Assuming GF means low-calorie or “healthier” — this doesn’t affect your baking, but it affects how you troubleshoot. GF baked goods often require more fat and eggs for proper texture, not less.
Frequently Asked Questions About Gluten-Free Baking Problems
GF flours absorb liquid differently than wheat flour — some absorb more, some absorb less, and the rate of absorption is slower. This means GF dough often starts out stickier than expected. Give it that 15–30 minute rest before judging the consistency, and resist the urge to add more flour immediately. Chilling the dough after mixing usually firms it up to a workable texture.
No — and this is one of the most common and costly GF baking mistakes. Coconut flour is extraordinarily absorbent; it soaks up 4–6 times more liquid than other flours. Using it as a direct swap will produce a dry, crumbly, almost inedible result. When using coconut flour, you generally need to dramatically increase eggs and liquid, and recipes are specifically written for it from scratch.
If your baked goods are gummy in the center or have a slightly gelatinous chew, too much xanthan gum is a likely culprit. A general guideline is ¼ teaspoon per cup of GF flour blend for cookies and cakes, and up to ½ teaspoon per cup for breads. If your blend already contains xanthan gum, do not add more — this is a very common double-dosing mistake.
GF baked goods brown on the outside faster than wheat-based ones, which makes visual doneness cues unreliable. The outside can look perfectly golden while the inside is still underbaked. Always use a toothpick test for cookies and muffins, and consider lowering your oven temperature by 25°F and extending the bake time slightly. An oven thermometer can also reveal whether your oven is running hot.
It can be, especially for experienced GF bakers who want to optimize for specific recipes or reduce cost. Homemade blends give you control over the starch-to-flour ratio, which lets you fine-tune texture. But for most home bakers — especially those just starting out — a quality certified GF commercial blend like Bob’s Red Mill 1-to-1 or King Arthur Measure for Measure is more consistent and less stressful. Our baking ratios cheat sheet walks through how to build your own blend if you decide to try it.
Stop the Guesswork, Start Baking
Gluten-free baking problems aren’t a reflection of your skill — they’re a reflection of chemistry that works completely differently than what most of us grew up learning. Spreading cookies need cold dough and the right binder ratio. Dense texture needs more leavening and proper flour balance. Gritty mouthfeel needs finer flour and resting time. Once you know the why, the fixes stop feeling like guesswork.
The truth is, I still have bad batches. But they’re rarer now, and I know exactly what to adjust when something goes sideways. Give yourself the same grace — GF baking has a real learning curve, and every failed batch teaches you something your next one benefits from.
If you want all of this in one place when you’re standing at the counter with flour on your hands, grab our free 4-Week GF Meal Plan PDF — it includes baking notes, flour substitution tips, and shopping lists that make the whole process easier from the start.
